How to Read a House Plan: A Guide for North Texas Homeowners
- scott shipp
- Jan 26
- 17 min read
Think of reading a house plan as learning to see the future—your future home, that is. It’s about translating lines on paper into the real-world flow and feel of your living space. The trick is to get comfortable with the different views (like the floor plan and elevations) and learn the basic language of symbols and dimensions that guide your builder.
Why This Is Your Most Important Skill
When you decide to build a custom home in Granbury or Weatherford, everything starts with the house plan. To a first-timer, it can look like an intimidating puzzle, a jumble of strange symbols and confusing lines. But learning to read these plans is the single most critical skill you can develop on your home-building journey.
Don't think of them as dry, technical schematics. Instead, see them as a personal roadmap to the home you've always imagined. This guide is here to be your translator, breaking down the jargon so you can talk confidently with your architect and builder.
From Blueprint to Reality
When you can read your blueprints, your conversations become incredibly productive. It’s the difference between just nodding along and actively shaping the design to perfectly match your family’s lifestyle. You’ll be able to spot potential headaches long before they become expensive, real-world problems.
For instance, you might catch things like:
Awkward flow: Is the trek from the garage to the pantry a pain, especially when you're hauling groceries on a rainy North Texas afternoon?
Wasted space: Is there a long, empty hallway that could be converted into a much-needed linen closet for your growing family?
Poor furniture placement: Will your beloved king-sized bed completely block the only window in the primary bedroom?
Daily annoyances: Does the front door swing open to give guests a direct view into a private bathroom? Not ideal.
Spotting these things on paper lets you make changes that cost little to nothing. A simple line erased and redrawn can save you from a daily frustration. Trying to fix that same issue after the walls are framed? That could cost thousands in labor and materials and throw your entire schedule off track.
Building Confidence and Avoiding Regret
Understanding your house plans is about protecting your investment and ensuring you get the home you've been dreaming of. It's your way of verifying that every detail you discussed is actually in the plan, from the specific stone veneer on the elevation drawings to the precise placement of outlets for your home office.
This is especially true when building on rural property in places like Glen Rose or Tolar, where details like well and septic locations are just as crucial as the layout itself. Getting a firm handle on your plans is the first step. The next is knowing what to bring up with your construction partner. As you prep for those initial meetings, it’s a great idea to review some of the top questions to ask custom home builders in North Texas to get the ball rolling.
Making Sense of Your House Plan Set
When you first get your hands on a full set of house plans, it can feel a little overwhelming. It’s not just one big drawing; it's a collection of different views that, when put together, tell the complete story of your future home. Think of it as a detailed instruction manual for one of the biggest investments you'll ever make.
Each type of drawing gives you a unique perspective, from a bird's-eye view of your entire property to a close-up of the exterior finishes. Getting comfortable with each one is the first real step toward ensuring the home you've imagined is the one that gets built. Let's walk through the essential drawings you'll see when building your new home here in North Texas.
Your house plan set, often called construction documents, is made up of several key "sheets" or drawings. Each one serves a distinct purpose, showing your builder exactly how to assemble your home. Here’s a quick rundown of what you’ll be looking at.
Your Guide to House Plan Sheet Types
Plan Type | What It Shows You | Why It's Important for Your North Texas Build |
|---|---|---|
Site Plan | A top-down view of your entire property, showing the house, driveway, utilities, and property lines. | Confirms your home is positioned correctly on the lot to meet setbacks, connect to utilities, and work with the land's natural slope. Crucial for rural builds in places like Glen Rose. |
Floor Plan | The familiar "bird's-eye" view of each level, detailing room layouts, dimensions, walls, doors, and windows. | This is all about flow and function. It’s where you verify room sizes and make sure your daily life will work seamlessly within the space. |
Elevations | A flat, 2D view of each exterior side of the house (front, rear, left, right). | This sheet is all about curb appeal. It specifies exterior materials like Austin stone or brick, window styles, and the overall look and feel of your home's exterior. |
Sections | A "slice" through the house from top to bottom, showing structural details and vertical relationships. | Reveals hidden construction details, like ceiling heights, foundation type, and roof structure, ensuring the home is built strong and to code. |
MEP Plans | Overlays showing Mechanical (HVAC), Electrical, and Plumbing systems. | This is the guts of the house. It maps out every outlet, light fixture, faucet, and vent, which is critical for comfort and convenience. |
Understanding what each sheet is for will help you give better, more specific feedback to your builder and designer.
The Site Plan: A View From Above
The site plan is your property’s master map. It shows exactly how your home will be situated on your piece of land, whether it’s a tight lot in a Granbury neighborhood or a few acres out in Glen Rose. This drawing is absolutely essential for seeing the big picture.
It’s about far more than just where the house sits. On the site plan, you’ll find critical information like:
The precise location of your driveway and its connection to the road.
Placement of utilities—water, electrical lines, and, especially for rural properties, the septic system layout.
Property lines, easements, and any required setbacks from the road or neighbors.
Topography lines that illustrate the slope of your land, which directly impacts foundation design and drainage.
For families building on larger lots in places like Weatherford or Stephenville, the site plan is where you confirm the house is angled just right to capture the best views, save that gorgeous old oak tree, or leave room for a future workshop.
The Floor Plan: The Familiar Bird's-Eye View
This is the one most people recognize right away. The floor plan is a top-down view of each level of your home, drawn as if you’d lifted the roof right off. It’s your main tool for understanding the layout, flow, and function of your living spaces.
Here, you’ll see how rooms connect, where walls are placed, and the exact location of every door and window. The plan gives you the precise dimensions of every single room, which helps you visualize if your king-size bed will fit comfortably or if that primary closet is truly as spacious as you hoped. This is where you can trace your daily routines—from carrying groceries into the pantry to the path your kids will take from their bedrooms to the living room.
Takeaway: The floor plan is where you live out your daily life on paper. Use it to check for practical details, like making sure a door doesn't swing awkwardly into a tight hallway or confirming there’s enough solid wall space in the great room for your entertainment center.
Elevation Drawings: Your Home’s Exterior Profile
While the floor plan shows you the inside, elevation drawings reveal your home’s exterior from all four sides: front, rear, left, and right. These drawings are all about nailing the curb appeal and exterior style. They bring the look of your home to life, detailing the specific materials that give it character.
This is where you'll see specifications for:
Exterior finishes: Will it be classic Texas stone, modern board-and-batten siding, or traditional brick?
Roof details: The pitch of the rooflines, the placement of gables, and any dormers are clearly shown.
Window and door styles: You can verify the grid patterns on the windows and the design of the front door.
Outdoor features: Porches, columns, and decorative trim are all illustrated here.
The elevations are how you visualize sitting on your back porch watching a Texas sunset or what guests will see when they pull into your driveway. Getting these details right is absolutely key to building a home you'll love pulling up to for years to come.
Section Views and MEP Plans: The Technical Layers
A section view is like a vertical slice cut straight through the house, showing you how it’s constructed from the foundation all the way up to the roof. It reveals critical details you wouldn't see otherwise, like ceiling heights, insulation types, and how different floors connect. This view helps ensure the structural integrity and energy efficiency of your home.
Finally, the MEP (Mechanical, Electrical, and Plumbing) plans are the home's nervous system. These are typically overlay drawings that show where every switch, outlet, light fixture, faucet, and HVAC duct will be located. Don't skip reviewing these—they're crucial for functional living. This is your chance to make sure there’s an outlet right where you need your coffee maker or that the AC vents aren’t blowing directly on your side of the bed.
For a deeper dive into making sure these systems and others are installed correctly during the build, our guide on a homeowner's construction quality control checklist for North Texas offers practical tips for your on-site walkthroughs.
Learning the Language: Symbols, Scales, and Dimensions
Diving into a set of house plans for the first time can feel like trying to decipher a secret code. But you don't need to be an architect to understand them. Once you get the hang of a few core concepts—symbols, scale, and dimensions—the entire document starts to make sense. This is where abstract lines on a page begin to look like your future home.
The scale is the key that translates the drawing into its real-world size. Most residential plans in North Texas are drawn at a scale of 1/4" = 1'-0". This simply means every quarter-inch on the paper represents one full foot in reality.
This ratio is incredibly useful. It lets you take an architect's scale or even a regular tape measure to the drawing, and then physically mark out that same space in your current living room or backyard. It’s the best way to get a true gut-feel for the size of a room before the first wall ever goes up.
Cracking the Code of Plan Symbols
Architects use standardized shorthand symbols to show everything from your kitchen sink's location to which way the master bedroom door will swing. Paying attention to that little arc showing a door's path can prevent a major annoyance, like a bathroom door that constantly smacks into the vanity.
Here are a few of the most common symbols you'll see on your floor plan:
Doors: A thin rectangle with an arc shows a standard door and its swing path. A double arc indicates French doors, while a pocket door looks like a thin rectangle that slides into a thickened part of the wall.
Windows: These usually show up as thin, hollow rectangles inside a wall. The specific style—casement, double-hung, or fixed glass—is typically called out in the window schedule or on the elevation drawings.
Electrical: Little circles with various lines and letters denote outlets, switches, and light fixtures. A circle with an "S" is a switch, while one with four lines sticking out usually represents a ceiling light.
Plumbing: Fixtures are often drawn as simplified versions of the real thing. You'll see an oval for a sink, a longer rectangle with an oval inside for a bathtub, and a circle attached to a small rectangle for a toilet.
Paying close attention to these symbols is your first line of defense against small but frustrating design flaws. Verifying outlet placement now prevents you from needing extension cords all over your new living room in your Tolar home later.
This quick guide highlights the distinct roles of the primary plan types, helping you understand how each contributes to the overall vision of your home.
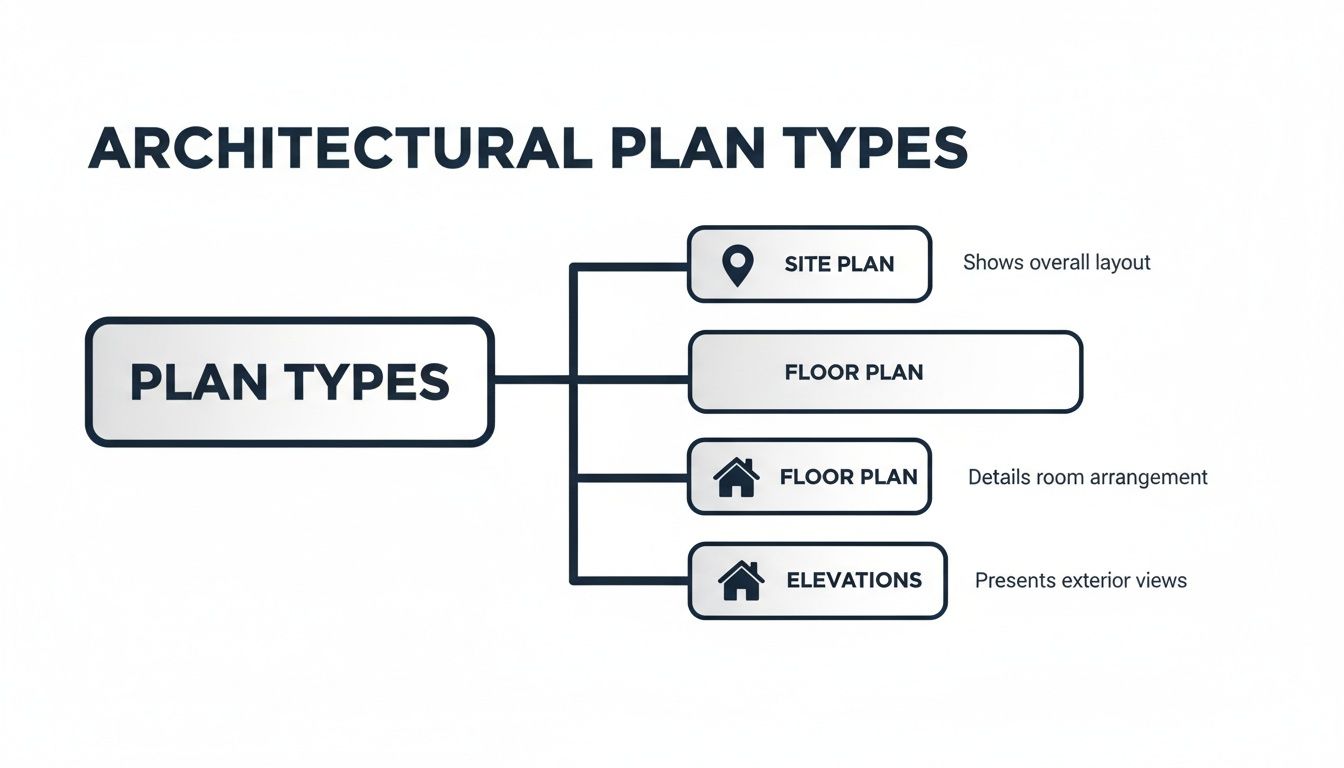
This visual shows how the site plan, floor plan, and elevations work together to provide a complete picture, from property layout to interior flow and exterior style.
Understanding Lines and Dimensions
You'll quickly notice that not all lines on a blueprint look the same. Their weight and style are part of the code, telling you exactly what you're looking at.
Thick, solid lines almost always represent walls.
Thinner solid lines often show things like built-in cabinets, countertops, or bookshelves.
Dashed lines represent things you can't see from a simple bird's-eye view, like an important overhead beam in a vaulted ceiling, the outline of an archway, or the edge of your roof overhang. On a site plan, a different pattern of dashed line often marks your property boundaries.
Finally, you have the dimension strings. These are the thin lines with tick marks and numbers that provide the exact measurements for every wall, window, and room. These dimensions are the most precise information on the entire plan, trumping even the scale drawing if there's a discrepancy.
You’ll see a long line running parallel to a wall, with smaller lines pointing to the specific start and end points of a measurement. For instance, a dimension string on an exterior wall will give you the total length (like 40'-0"), and then a series of smaller numbers beneath it will show you the precise placement of doors and windows along that wall.
Learning to read these strings is how you'll confirm that the primary suite in your future Weatherford home is the spacious retreat you and your builder agreed on.
Take a Mental Walk Through Your Future Home
Once you've got a handle on the symbols and scales, the real fun begins. This is the part where you stop just reading a blueprint and start actually living in it, long before a single nail is hammered.
I always tell my clients that the most important thing they can do is a mental walk-through. It’s the single best way to catch those little design quirks that look perfectly fine on paper but would drive you crazy in real life. All it takes is tracing your daily routines right there on the floor plan. This simple exercise helps you feel the flow of the home and spot issues with traffic patterns, convenience, and day-to-day livability.
Trace Your Day-to-Day Routines
Start with the absolute basics. Picture a typical Tuesday morning. Where do you park your car? Now, trace the path you'd take into the house. If you're coming in through the garage with your arms full of groceries, how many steps does it take to get to the pantry or kitchen counter? A journey that feels long and winding on paper will feel ten times worse in reality.
Think through these everyday scenarios:
The Morning Rush: How does the traffic flow between the kids' bedrooms, their bathroom, and the kitchen? Is everyone going to get jammed up in one narrow hallway?
Laundry Day: Where are the washer and dryer? Is it a trek from the primary closet, or will you be hauling heavy baskets up and down stairs all day?
Welcoming Guests: When friends arrive, what's their first impression? Does the entryway feel open and inviting, or does it offer a direct view into a cluttered mudroom or a private bathroom?
This isn't about finding fault with the design. It's about optimizing it for real-world comfort and convenience. A small change now—like adding a pass-through door from the primary closet to the laundry room—can make a massive difference in your quality of life.
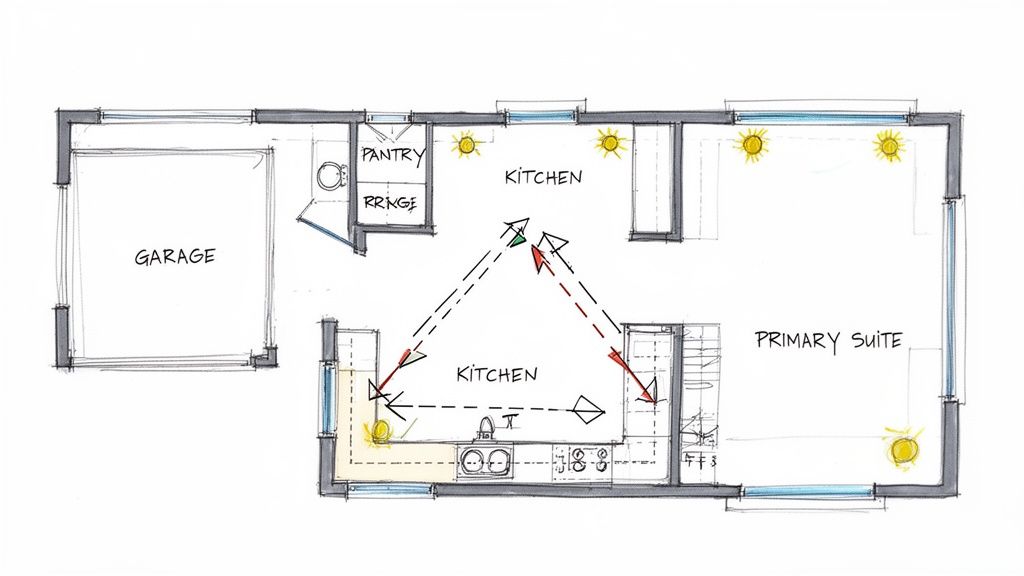
Evaluate Key Functional Zones
Some areas of a home just work harder than others, and their layout has a huge impact on your daily life. A classic example is the "kitchen work triangle," the path that connects the sink, refrigerator, and stove. An efficient design keeps these three points close but not cramped, making meal prep feel effortless. But if a massive island separates them, you'll be doing laps just to make dinner.
For families, the relationship between bedrooms is critical. Do you want the kids' rooms right next to yours for easy late-night check-ins? Or would you prefer a split floor plan, with the primary suite on one side of the house for a bit more peace and privacy? There’s no right or wrong answer, but the blueprint is where that crucial decision gets locked in.
Pro Tip: Don't just look at the rooms themselves; look at the space between them. I often have clients literally draw lines on the plans from the main entry points (front door, garage door) to high-traffic spots like the kitchen and living room. If all those lines converge and cross right through a key work area, you’ve just found a future bottleneck.
Plan for How You'll Live Tomorrow
A custom home should serve you well for years. For anyone building their "forever home" in North Texas, this means thinking about accessibility from day one.
Keep an eye out for these "aging-in-place" features on your plans:
Wider Doorways: Look for doorways specified as 3'-0" (36 inches) wide instead of the standard 32 inches. That small difference is huge for future walker or wheelchair access.
Zero-Threshold Showers: Check the primary bathroom design. Does the shower have a curbless or "zero-threshold" entry? This simple detail eliminates a common trip hazard.
Main-Floor Living: If you're looking at a two-story plan, is there a primary suite on the ground floor? This ensures you can live comfortably on one level if stairs ever become a challenge.
Finally, think about how your home sits on your property. Pull out the site plan and elevations to check window placement. Is the living room going to get that beautiful morning sun you love? Are there enough windows on the back of the house to enjoy the view? Understanding your home's orientation is the key to maximizing natural light and truly enjoying your land.
Where the Real Quality is Hiding: Structural Notes and Finish Schedules
Floor plans show you the layout, and elevations give you that all-important curb appeal, but the heart of your home’s quality is buried in the details. You'll find it in two of the most critical—and most overlooked—parts of any blueprint set: the structural notes and the finish schedule.
This is where your builder’s promises are put down in black and white. Learning to read your plans isn't just about spotting room sizes; it's about understanding the bones that make your home strong and the specific materials that will make it uniquely yours. These sheets might look technical, but they're your best tool for verifying quality.

Uncovering Strength in the Structural Notes
Think of the structural notes as the engineering soul of your home. They tell your builder exactly how to construct everything so it stands strong for decades against the unique challenges we face here in North Texas.
Around Granbury and Weatherford, our expansive clay soil can wreak havoc on a foundation if it isn't engineered correctly. The structural notes are where you'll find the specific plan for your foundation—whether it’s a post-tension slab or another engineered solution. This includes critical details like the required concrete strength ( measured in PSI) and the precise size and spacing of the steel rebar.
Other crucial details to hunt for include:
Header Sizes: These are the beefy beams that span large openings for windows and doors. The notes will call out their exact size (e.g., "2-2x12 LVL") to ensure they can support the weight of the roof and walls above.
Framing Details: Here, you'll find specifics on lumber grades, stud spacing (usually 16 inches on-center), and requirements for shear walls, which give the home stability against high winds.
Roof Truss Plans: This section details the engineering of your roof structure, guaranteeing it can handle its own weight and transfer that load safely through the walls to the foundation.
This isn't just builder-speak; it's the recipe for a durable, well-built home.
The Finish Schedule: Your Home’s Personal Shopping List
If the structural notes are the home’s skeleton, the finish schedule is its personality. This is the master list specifying every single material, fixture, and color that goes into making your house a home. It's essentially a highly detailed spreadsheet that leaves no room for interpretation.
Without a detailed finish schedule, a vague line in a contract like "granite countertops" is practically meaningless. Is that a basic, entry-level granite, or the stunning, high-end slab you fell in love with at the design center? The finish schedule clears up all that ambiguity.
This document is your best friend when comparing builder quotes. If one bid comes in significantly lower than another, a quick scan of the finish schedule often reveals why. They might be specifying lower-grade flooring, basic light fixtures, and builder-grade appliances. A lower price often means cheaper materials, which can cost you more in the long run.
What to Look For on the Schedule
A finish schedule is typically organized as a room-by-room table. For each space (Kitchen, Primary Bath, etc.), it should clearly list:
Flooring: The exact type, brand, and color (e.g., "Mohawk RevWood Plus, color 'Southern Hickory'").
Paint: The manufacturer, finish (eggshell, satin), and specific color codes for walls, trim, and ceilings.
Fixtures: Model numbers for everything from the kitchen faucet (Delta? Moen?) to the ceiling fans and vanity lights.
Cabinetry: Details on the wood species, door style, and finish for the kitchen and baths.
Countertops: The specific material, its thickness, and the edge profile.
This schedule is the direct link between your design vision and the final contract. As you make selections, triple-check that every item is updated on this document. And if changes pop up during the build, knowing the right way for mastering construction change order management is key to keeping your project on track and on budget.
Common Questions About Reviewing House Plans
As you start digging into your blueprints, you're going to have questions. That’s not just normal—it’s a crucial part of the process. Let's walk through some of the most common questions we hear from clients across North Texas when they're learning how to read a house plan for the first time.
Preliminary Plans vs. Construction Drawings
A lot of clients ask, "What's the difference between these early sketches and the final set?" It’s a great question, because they look similar but serve totally different functions.
Preliminary plans are the "big picture" outline. They map out the general design, give you approximate room sizes, and show what the exterior will look like. Think of them as the advanced concept stage—they're perfect for getting initial bids from builders and making major design changes without it costing a fortune.
Construction drawings, on the other hand, are the intensely detailed blueprints your builder will use to actually construct your home. Every single detail is spelled out, from the specific rebar needed for your foundation in Granbury's clay soil to the precise location of every light switch. These drawings leave zero room for guesswork on the job site.
How Can I Be Sure My Furniture Will Fit?
This is probably the number one worry for every homeowner, and for good reason! The secret is using the plan's scale, which is almost always 1/4" = 1'-0".
Here’s a practical way to test your layout:
Start by measuring your most important furniture—that king-size bed, the giant sectional sofa, or the dining table that seats the whole family.
Next, create little paper cutouts of each piece, drawing them to the same 1/4" scale. For example, a 6-foot-wide sofa becomes a 1.5-inch-wide paper cutout (6 quarters of an inch).
Now, the fun part: move these cutouts around on your printed floor plan.
This little exercise shows you things a 2D drawing never will. You’ll immediately see if a door is going to swing into a nightstand, if the walkway around your bed feels too tight, or if that favorite armchair will completely block the flow of traffic into the living room. It’s a five-minute task that can save you years of daily frustration.
What Are Common Mistakes to Avoid?
When you’re staring at plans for a new home in Weatherford or Glen Rose, it's easy to get tunnel vision and miss things. We see a few common mistakes pop up again and again.
Focusing only on the floor plan: This is the biggest one. The elevation drawings are what determine your home's entire curb appeal, and the site plan dictates how your house actually lives on your property. Make a point to review every single sheet in the set.
Ignoring the "unseen" elements: It’s easy to gloss over things like the HVAC unit placement. Is that noisy outdoor condenser going to be right under your bedroom window? The MEP and site plans hold the answer.
Forgetting about door and window swings: A door swinging into a tight bathroom can make the whole space feel cramped and awkward. In the same way, a beautiful casement window that can't fully open because it bangs into a porch column is a detail you want to catch on paper, not after it's installed.
The best advice I can give is to review your plans when you're fresh and can give them your undivided attention. Go through each sheet multiple times, looking for something different each time—first for flow, then for details, then for potential problems.
What If I Want to Change Something?
If you spot something on the plan that doesn't feel right, speak up immediately! Your builder expects and wants your feedback during this stage.
The best way to handle it is to circle the item directly on your copy of the plans, write a clear note about the change you want, and bring it to your builder right away. Changing a line on a piece of paper is simple and usually very inexpensive. Trying to move a wall after it’s already been framed? That’s a whole different story—it’s costly, creates waste, and can throw your entire project schedule off track.
This design and review stage is your golden opportunity to get everything perfect. A truly collaborative process now ensures the home you build is exactly the home you've been dreaming of.
Ready to turn those plans into a home you'll love for a lifetime? We're here to guide you through every step, from reviewing your initial concepts to handing you the keys. Schedule your free, no-obligation consultation today.
Comments