A Homeowner's Guide to the North Texas Roof Insurance Claim Process
- scott shipp
- Dec 20, 2025
- 14 min read
When a nasty North Texas storm rolls through Granbury or Weatherford, your roof is the first line of defense—and often the first casualty. Standing in the aftermath can be overwhelming, but understanding the roof insurance claim process is the first step toward putting things right. This guide will walk you through it, from that first look at the damage to the final check for repairs, so you’re never left guessing.
What to Expect from Your Roof Claim
Let's be honest, dealing with storm damage is a headache. Add an insurance claim on top of it, and it's easy to feel lost. Whether it's the golf-ball-sized hail we see all too often in North Texas or straight-line winds that tear shingles loose, the path forward isn't always clear. A successful claim boils down to three things: solid documentation, quick communication, and good teamwork between you, your insurance company, and your roofer.
For folks on rural properties around Glen Rose or Stephenville, the pressure can feel even more intense. A busted roof is more than just a leak; it's a real threat to your home and family. A damaged roof can also lead to bigger problems like interior water damage. Our guide to household flood protection can help you think through those worst-case scenarios.
Think of the claim as a journey with a few key stops along the way.
This structured process builds on itself, which is why being organized from the very beginning is so important.
Key Factors Influencing Your Claim
Every storm and every roof is different, but a few things almost always influence how a claim plays out in our area.
Policy Specifics: Your insurance policy is the rulebook. Does it have a separate, higher deductible for wind and hail? Does it pay Actual Cash Value (ACV), which accounts for depreciation, or Replacement Cost Value (RCV)? The difference in your final payout can be thousands of dollars.
Storm Severity: When a massive hailstorm hits Weatherford, you're not the only one calling your insurance company. Adjusters get slammed, and everything can slow down. Patience becomes a virtue.
Contractor Partnership: The roofer you hire is your advocate. A good, local contractor from the Granbury area knows the ropes. They can meet with the insurance adjuster, point out damage the adjuster might miss, and ensure your roof is restored to pre-storm condition, not just patched up.
The single biggest mistake a homeowner can make is waiting too long to act. Insurance companies need to link the damage to a specific storm event, and delays can weaken your claim. Prompt action is your best strategy.
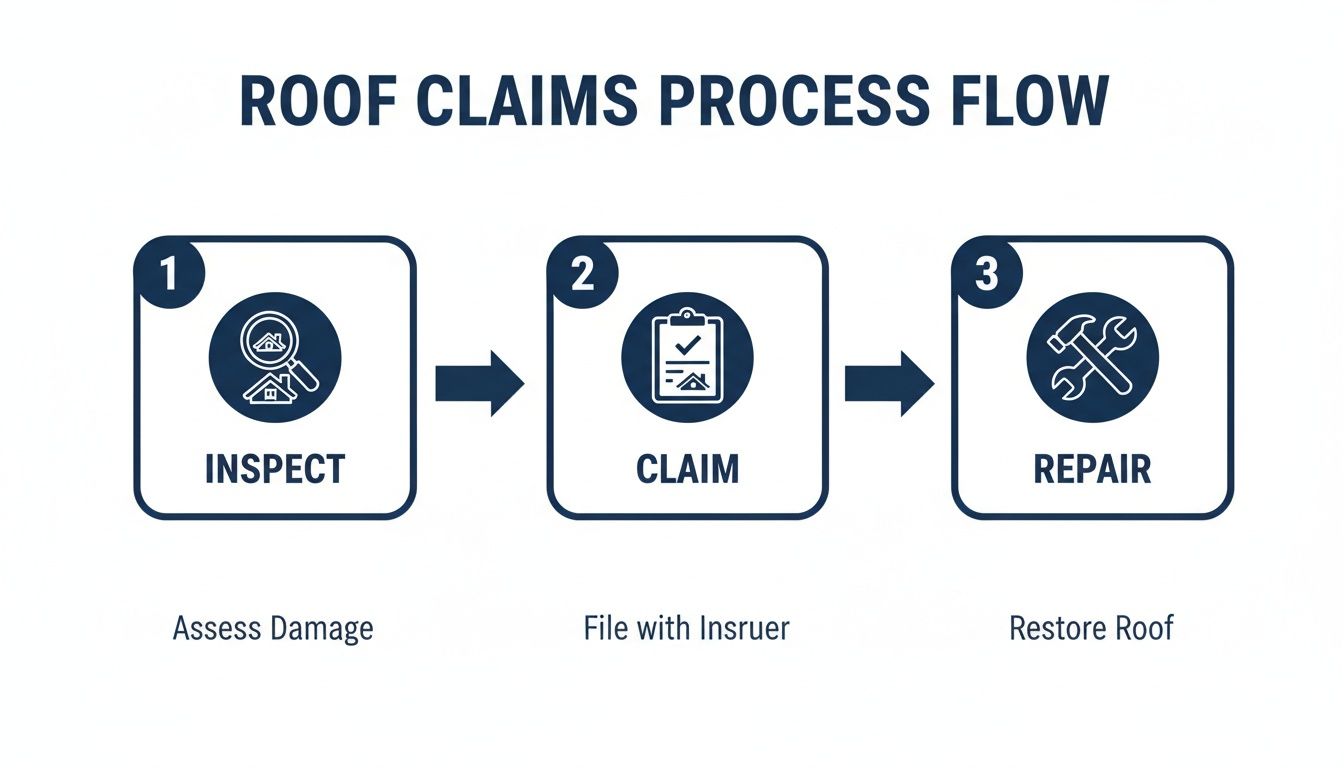
North Texas Roof Claim Phases at a Glance
Phase | Your Primary Role | Crucial Tip for Local Homeowners |
|---|---|---|
Initial Damage Assessment | Document everything with photos/videos and get a professional inspection. | Hail damage isn't always visible from the ground. Get a pro on the roof to look for bruises and granule loss. |
Filing the Claim | Contact your insurer promptly with your policy number and date of the storm. | Keep a dedicated notebook or digital file for all claim-related notes, numbers, and names. It's a lifesaver. |
Adjuster Meeting | Meet the insurance adjuster at your home, preferably with your roofer present. | Your roofer can point out damage and discuss repair scope with the adjuster in their own language, preventing lowball estimates. |
Repair & Payment | Sign a contract with your chosen roofer and manage the payment process with your insurer. | Understand how depreciation is handled. You'll likely get two checks: one for ACV upfront, the second after work is done. |
Whether you have a young family or are enjoying retirement in a custom-built home, the goal is the same: restore your home and your peace of mind efficiently. We'll break down each of these stages with practical tips to help you navigate your claim with confidence.
What to Do Right After the Storm Hits
The first 48 hours after a big North Texas storm are a critical window. What you do in those initial hours can make or break your entire roof insurance claim. The goal is to build an undeniable case for the damage before you ever file the claim.
And let's get one thing straight: this does not mean climbing up on your roof. Please, never get on a potentially compromised roof. You can see almost everything you need from the safety of the ground, and it's just not worth the risk.
Your Ground-Level Damage Hunt
Start by doing a slow walk around your entire house with your phone out, ready to take photos and videos of everything. First, get some wide shots of each side of the house to set the scene. Then, it's time to zoom in and hunt for the tell-tale signs of storm damage.
Here’s exactly what to look for:
Shingles in your yard: This is the smoking gun for wind damage. If you find shingles on the ground, document them with photos right where they landed.
Dented gutters and downspouts: Hail loves to beat up soft metals. Check your gutters, downspouts, and even the fins on your AC unit for dings and dents.
Siding, window, and screen damage: Look for any chips, cracks, or holes in your siding. Don't forget to check window screens for tears and the trim around the windows for dents.
Banged-up vents and flashing: Those metal vents and turbines on your roof are hail magnets. They're usually easy to spot from the ground and serve as powerful proof of hail impact.
A pro tip we give our clients in Weatherford and Granbury: grab a piece of sidewalk chalk. When you spot a clear hail dent on a vent or gutter, circle it with the chalk before you snap the picture. It makes the damage pop and leaves no doubt for the insurance adjuster.
Don't Forget to Look Up (Inside)
After you've covered the exterior, head inside. Scan your ceilings for any new water stains, paying close attention to rooms on the top floor. Check around skylights and chimneys, too. A small, yellowish-brown spot that wasn't there yesterday is a huge red flag for a leak. If you can, safely peek into your attic with a flashlight to look for damp insulation or active drips.
We recently helped a family in Weatherford whose only initial sign of a major leak was a faint, tea-colored stain in the back of a guest room closet. Because they documented it right away, they could tie it directly to the hailstorm, which was crucial for getting their claim approved without a fight.
Taking Photos and Videos That Win Claims
Your smartphone is your best friend right now, but how you use it matters.
Create a Visual Record:
Start with a video tour. Walk around the property while filming. State the date and time out loud to timestamp your evidence and show the overall situation.
Get close-ups. Take multiple, clear photos of every single dent, tear, or piece of shingle you find. Shoot from a few different angles.
Show the scale. This is huge. Place a coin, a golf ball, or a tape measure next to the damage. This gives the adjuster an immediate and undeniable sense of size.
Keep it all organized. Make a specific folder on your phone or computer for this claim. Name your files clearly (e.g., "May-15-2024-Front-Gutter-Hail-Damage.jpg").
When you hand an insurance adjuster a well-organized file filled with clear, detailed evidence, it builds instant credibility and can significantly speed up the entire process. Once you have this initial file built, it's time for a professional opinion.
Filing Your Claim and Meeting the Adjuster
You've documented the damage. Now, it's time to officially file your roof insurance claim. Making that first call can feel daunting, but being prepared makes all the difference.
When you call your insurance company, have these details ready:
Your Policy Number: This is the first thing they’ll ask for.
The Date of the Storm: Be specific. This is what they call the "date of loss."
A Quick Damage Summary: Keep it simple. "Hail damage to the roof, gutters, and window screens" works perfectly.
Your Contact Info: Double-check that they have the best phone number and email to reach you.
During that call, you'll be given a claim number. Write it down and keep it somewhere safe—it's your reference for everything moving forward. Before you hang up, ask what comes next and when you should expect to hear from an adjuster.
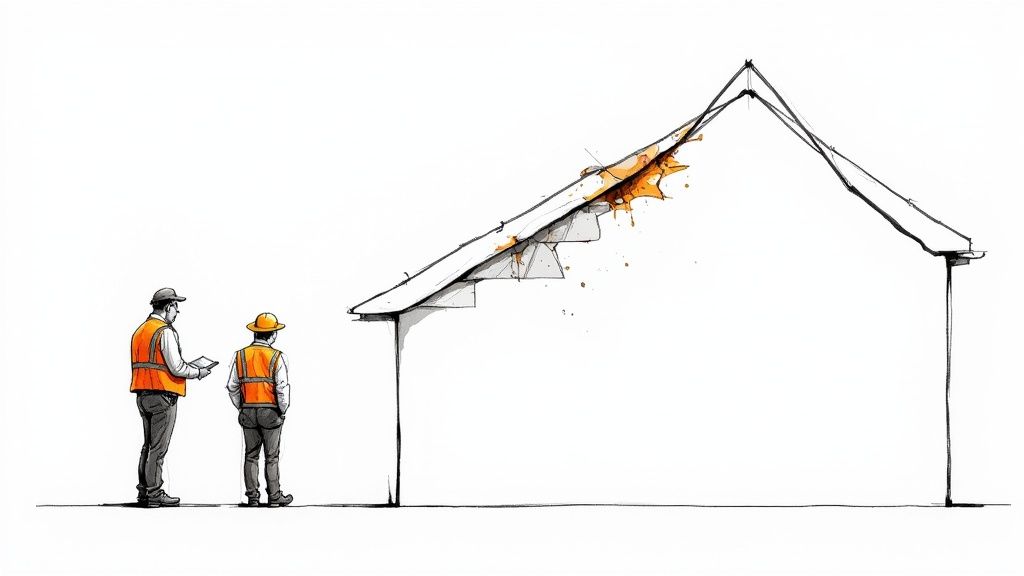
The Adjuster's Visit: What to Expect
Usually, within a few days to a week, an insurance adjuster will call to schedule an inspection. This meeting is the single most important part of your claim. The adjuster’s findings will form the basis of the insurance company's initial settlement offer.
The person who shows up might be a staff adjuster (an employee of the insurance company) or an independent adjuster (a contractor they hire). After a big North Texas storm, it's common to see independent adjusters as insurance companies get swamped. Either way, their job is the same: to evaluate the damage covered under your policy.
My best advice? Be there for the inspection. And even more importantly, have a trusted local roofer in your corner.
Inviting your roofing contractor to the adjuster meeting is one of the smartest moves a homeowner can make. They act as your expert advocate, speaking the same technical language as the adjuster and ensuring that subtle or hard-to-spot damage isn’t overlooked.
Why Your Roofer Should Be at the Adjuster Meeting
An experienced roofer from the Granbury area knows exactly what to look for after the kind of hail and wind we get. They can spot the "bruises" on shingles that an overworked adjuster might otherwise miss.
Here’s what a good roofer brings to that meeting:
A Second Set of Expert Eyes: They'll check for damage on flashing, pipe boots, and other vital parts of your roofing system.
Accurate Scoping: They ensure the adjuster’s measurements and damage assessment are complete and correct.
On-the-Spot Collaboration: If there's a disagreement, they can discuss it then and there, potentially preventing a long dispute later.
For instance, an adjuster might initially only approve a small repair. A knowledgeable roofer can explain why, due to the shingle type or age, a patch won't work and a full replacement of that slope is required to maintain the roof’s integrity. That kind of real-time advocacy can dramatically impact the scope of work your insurer approves. We break down how we can help during this crucial step in our guide to navigating insurance claims.
Questions to Ask the Adjuster
Engage with the adjuster politely and ask questions so you fully understand what's happening.
Here are a few good ones to have ready:
Could you walk me through what you're seeing and noting in your report?
What's your process for deciding between a repair and a full replacement?
When can I expect to see a copy of your report and the estimate?
If I have more questions later, what's the best way to get in touch with you?
By being present, prepared, and backed by a professional roofer, you set yourself up for a fair outcome.
Understanding Your Insurance Settlement Paperwork
After the adjuster leaves, a packet of paperwork will arrive from your insurance company. This is the adjuster's summary, and it can be confusing. Understanding it is non-negotiable—this document dictates exactly how much you're getting for your new roof.
Think of this summary as the blueprint for your roof replacement. Let's walk through the key terms.
The Three Most Important Numbers on Your Claim
Your settlement isn't one lump sum; it's a careful calculation. Focus on three critical figures: RCV, Depreciation, and ACV.
Replacement Cost Value (RCV): This is the total estimated cost to replace your roof with new, similar materials at today's prices. It's the full market price for a new roof in a town like Granbury.
Depreciation: Insurance sees your old roof like a used car—it loses value over time. Depreciation is the amount they subtract from the RCV to account for your roof's age and wear. The insurance company holds this money back until the job is done.
Actual Cash Value (ACV): This determines the amount of your first check (minus your deductible). The math is simple: RCV - Depreciation = ACV. This initial payment gets the project rolling.
Let's use a real-world scenario. Say the RCV for your roof in Stephenville is $20,000. The adjuster determines your old roof has $6,000 in depreciation. That makes the ACV $14,000. If you have a $2,000 deductible, your first check will be for $12,000.
Once your contractor finishes the job and sends the final invoice to your insurer, they release that withheld $6,000. That's why it's called Recoverable Depreciation—you get it back once you prove the work is complete.
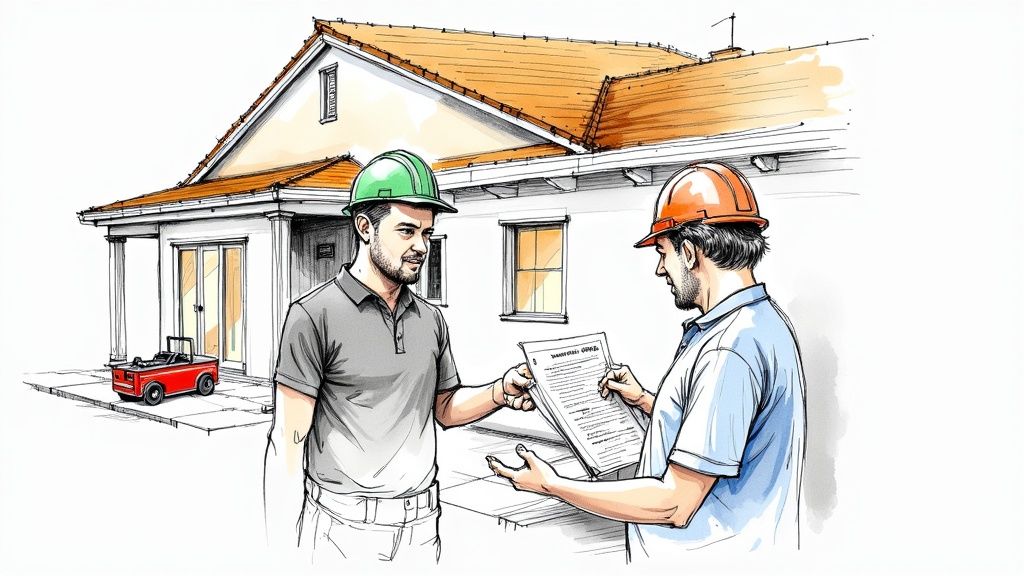
Now Comes the Hard Part: Choosing a North Texas Roofer
With that first check in hand, it’s time to hire your contractor. After a big hailstorm rolls through Weatherford or Glen Rose, you'll see an army of trucks from out of state. These "storm chasers" often do a slapdash job and are gone before the next storm, leaving you with a faulty roof and a worthless warranty.
Your best defense is hiring a truly local contractor. We live here. Our reputation in the community is everything, and we’ll be here to stand by our work long after the storm chasers have moved on.
How to Vet a Local Roofing Pro
Use this checklist to separate the pros from the pretenders:
Are they genuinely local? Ask for a physical office address, not just a P.O. box. A roofer who knows North Texas understands our specific building codes and wild weather.
Can they prove they're insured? They must provide a current certificate showing both general liability and worker's compensation coverage. This protects you from liability if someone gets hurt on your property.
Do they have solid, local references? A good roofer will be happy to give you the names of recent customers right in your area.
Will they provide a detailed, written contract? The agreement should spell out the exact scope of work, materials, total cost, and payment terms. Never sign a blank contract.
What Really Goes Into the Cost of a New Roof?
Your insurance settlement is based on current market costs, but what drives that price? In North Texas, a few things really move the needle.
Your Choice of Materials: Architectural shingles are standard, but many homeowners are upgrading to more durable options. Class 4 impact-resistant shingles and metal roofing are incredibly popular for a reason, and a great choice for families planning to stay in their home long-term.
The Complexity of Your Roof: A simple, low-pitch gable roof on a one-story home is straightforward. A two-story house with steep pitches, lots of valleys, and dormers is a much more complex and costly job. The typical cost for a shingle roof replacement in our area ranges from $8,000 to $25,000+, depending on these factors.
Local Labor Rates: After a widespread storm, demand for skilled roofing crews skyrockets, and labor costs can tick up temporarily.
Insurers are also getting tougher about the age of a roof. Once a roof hits the 20-year mark, many insurers will only offer depreciated ACV coverage or hit you with a massive premium increase. You can read more about how roof age impacts insurance rates and see the data for yourself.
Handling an Underpaid or Denied Roof Claim
Getting a lowball offer or an outright denial from your insurance company can feel like a punch to the gut. But this is often just the opening bid in a negotiation, not the final word.
Sometimes an insurer has a legitimate reason to deny a claim. If your roof was already old and showing significant wear and tear, they might argue the storm wasn't the primary cause of failure. More often, though, a denial or low offer is the result of a rushed inspection by an overworked adjuster.
So, How Do You Know if the Assessment is Unfair?
Your first move is to get a detailed, line-item estimate from a trusted local roofer and compare it to the adjuster's report. If you haven't brought in a contractor from the Granbury or Weatherford area yet, now's the time.
Look for these tell-tale signs that something is off in the insurance report:
Missing Pieces: Did the adjuster leave out damaged flashing, pipe boots, or ventilation systems?
Mismatched Math: Does their report account for far less material than your roofer measured? For example, they might approve 15 squares of shingles when your roof needs 25.
Yesterday's Pricing: Are their costs for labor and materials reflecting today's market in North Texas? A major storm often causes a temporary spike in these prices.
If your roofer’s estimate is significantly higher and clearly documents legitimate damage the adjuster overlooked, you have a strong basis for contesting the decision.
Building a Stronger Case: The Appeals Process
Don't just throw your hands up. The roof insurance claim process has avenues for you to appeal. Start by formally requesting a reinspection, specifically asking for a different adjuster to be sent out.
When you make that request, lay out your case politely but firmly in writing. Point to the exact discrepancies between their report and your roofer’s estimate. Attach the photos and documentation you took right after the storm—this is where that initial diligence pays off.
A classic example we see around Glen Rose is an adjuster approving a "repair" for a few shingles on a roof that's too old and brittle for it. A quality roofer can provide a written statement explaining why a patch job would cause more problems, which often pushes the insurer to approve a full replacement for that slope.
When to Call in a Public Adjuster
What if a second inspection still doesn't move the needle? Or what if your claim is especially large and complicated? This is when you might consider hiring a public adjuster.
Unlike the adjuster sent by your insurance company, a public adjuster works for you. They are licensed professionals who take over the entire process—all the paperwork, phone calls, and negotiations—with the single goal of maximizing your settlement. They typically work for a percentage of the final claim payout, meaning their success is tied directly to yours.
Finalizing Your Roof Replacement and Claim
You’ve got the green light from your insurance company—congratulations! Now it’s time to bring it all home. The first thing on the agenda is getting the roof replacement scheduled. Here in the Granbury area, a good roofer will manage the entire process, from getting materials delivered to your doorstep to the final site cleanup.
Once the last shingle is nailed down, it's time for the final walkthrough. You'll join your contractor to inspect their work, making sure everything looks exactly as it should and that your yard is free of nails and debris. Don't be shy; this is your opportunity to sign off on a job well done.
Securing Your Final Payment
With the walkthrough complete, your contractor will give you the final invoice. This is what you need to get the rest of your money from the insurance company.
You’ll send this invoice directly to your insurer, proving the work is finished. This prompts them to release the held-back funds, often called recoverable depreciation. If you have an RCV policy, this is the payment that covers the full replacement cost. I've seen homeowners in Weatherford and Glen Rose miss this step and accidentally leave thousands of dollars unclaimed.
Expert Tip: Before you hand over that last check to your roofer, always ask for a lien waiver. This simple but powerful document proves they've paid their suppliers and subcontractors. It’s your protection against any surprise claims being filed against your property down the road.
Lastly, keep a dedicated folder for all the claim paperwork. This includes the adjuster's report, your contract, the final invoice, and that all-important lien waiver. Trusting your contractor is essential, whether for a roof or a full build; our guide on finding custom home builders in North Texas has more great advice on vetting local professionals.
Answering Your Top Questions About the Roof Claim Process
Even after walking through the process, it's natural for North Texas homeowners to have a few more questions pop up. Let’s tackle some of the most common ones we hear from folks in our community.
How Long Do I Have to File a Roof Damage Claim in Texas?
Your policy is the final word, but generally, Texas homeowners have one year from the date of the storm to file a claim.
But here’s some hard-earned advice: don't wait. The longer you put it off, the muddier the waters get. It becomes much tougher to prove that the damage was caused by one specific storm, and not from wear and tear over time. Your best bet is to file as soon as you've got your damage documented—we’re talking days, maybe a few weeks at most.
Will Filing a Roof Claim Make My Insurance Rates Go Up?
This is a big one, and thankfully, the answer is usually no—at least not directly. A single weather-related claim, often called an "Act of God," typically won't cause your individual premium to spike.
What does cause rate increases is widespread damage. If a massive hailstorm hammers the Weatherford or Granbury area, insurers might raise rates for everyone in that ZIP code to account for the heightened risk. It's the regional risk, not your personal claim history, that really moves the needle.
It's a common fear that filing a claim paints a target on your back for a rate hike. The reality is that insurers set rates based on large-scale risk models. Your claim is just one data point among thousands after a major storm.
What if My Mortgage Company Is on the Insurance Check?
Don't panic—this is completely normal. Your mortgage lender has a financial stake in your home, so the insurance company includes them on the check to protect that interest.
You'll need to reach out to your lender to figure out their specific process for endorsing the check and releasing the funds to you. It often involves sending them some paperwork and might even require a property inspection. It’s a good idea to kick off that conversation as soon as you get the check to avoid any delays.
Going through a claim can feel overwhelming, but you're not in it alone. If you're running into questions or just need a reliable partner for your roof restoration in the Granbury area, Gemini Homes is ready to help. Get in touch with us for a no-nonsense consultation at https://www.geminihomesgranbury.com.
Comments