Finishing Basement Ceilings in North Texas
- scott shipp
- Nov 24, 2025
- 16 min read
When you decide to finish your basement in North Texas, you’re transforming a forgotten storage area into a genuine living space. The first thing you'll notice? What’s going on overhead. Your basement ceiling isn’t just a lid for the room; it sets the tone for everything else, from lighting and sound to the overall feel of the space.
This guide is written specifically for homeowners here in Granbury, Weatherford, and our neighboring communities. We’ll get into the practical advice that matters for your project in this part of Texas.
Your Guide to Basement Ceilings in North Texas
Choosing a basement ceiling defines the character of your new space. The right one can make the room feel taller and brighter, turning a dark lower level into a place your family actually wants to be. It’s the key to making the basement feel like a natural part of your home, not an afterthought.
Most of the time, the goal is to hide that chaotic web of plumbing, electrical wires, and ductwork snaking across the joists. But there's no single "best" answer, especially around here. Local conditions, like high humidity and the infamous expansive clay soil that can cause foundation shifts, play a big role in what makes the most sense for your home.
Key Considerations for Your Project
The decision always comes down to balancing how you want it to look versus how you need it to function. Think about what this new space is for. A rustic game room in a Glen Rose barndominium has very different needs than a sleek, modern home theater in Aledo.
Before you get lost in material options, let's start with the big-picture questions:
Access vs. Aesthetics: How important is a clean, seamless look compared to being able to easily get to your pipes and wiring later? This is a huge deal for anyone on a rural property with a well or septic system that might need occasional service.
Ceiling Height: Every inch counts in a basement. How much headroom can you afford to give up? A drywall ceiling hugs the joists, while a suspended ceiling will drop the height by several inches.
Moisture and Sound: Is your basement prone to that classic North Texas humidity? And what about noise? If you’re building a home theater or a playroom for the kids, you'll want to think seriously about soundproofing.
Lighting and Ambiance: What kind of lighting are you picturing? Your ceiling choice directly impacts whether you can install recessed can lights, track lighting, or other stylish fixtures.
We'll walk through all the popular choices, from the classic, finished look of drywall to the practical, easy-access design of a drop ceiling. Whether you're planning a cozy family room, a quiet home office, or just a finished-out laundry space, we'll give you the insights to make the right call. We’ll compare the most common ceiling types, dig into the practical factors for our region, and give you a realistic idea of what to expect for cost and timing.
Comparing Your Basement Ceiling Options
The first big decision you'll make when finishing your basement is the ceiling. This choice really sets the tone for the entire space and dictates a lot about its future use and maintenance. So, let’s walk through the top contenders for North Texas homes to see which one makes the most sense for your project.
We'll look at the three most common paths homeowners take: classic drywall, practical suspended (or drop) ceilings, and the increasingly popular exposed-joist look. Each has a different vibe and its own set of real-world pros and cons.
The Classic Finish: Drywall Ceilings
If your goal is to make the basement feel like a natural extension of your upstairs living area, drywall is the undisputed champion. This is what we recommend for homeowners in Aledo and Granbury who want that seamless, "main floor" feel. Drywall gives you a smooth, solid surface you can paint to match everything else, making the new space feel bright, polished, and truly finished.
This clean, traditional look is perfect for creating a sophisticated living room, a dedicated home theater, or a comfortable guest suite. Another big plus? Drywall is installed right up against the floor joists, so you squeeze out every possible inch of headroom.
The trade-off for all that seamless beauty is access. If a pipe ever leaks or you decide to run new wiring for a speaker system, you're cutting into the ceiling, followed by patching, sanding, and repainting. It's a whole process, and it’s something to seriously consider, especially if you’re on a rural property where you might need to access well or septic lines more often.
The Practical Choice: Suspended (Drop) Ceilings
A suspended ceiling—what most people call a "drop ceiling"—is a simple, brilliant system. It's a lightweight metal grid that hangs just below your floor joists, and you simply drop finished panels into each square. Forget the sterile office look from the 80s; today’s ceiling tiles come in a huge range of styles, from elegant coffered designs to rich wood-grain textures.
The number one reason people choose a drop ceiling is for the unbeatable access. Got a plumbing leak? Pop a tile out. Want to add recessed lighting? Pop a tile out. It's that simple. This practicality is why the global market for these systems is projected to hit $7,997.2 million by 2025. You can dig into the numbers and trends behind this growth on Future Market Insights.
For homeowners here in North Texas, especially those with larger properties in places like Weatherford or Glen Rose, that easy access can be a lifesaver. The only real downside is that you will lose some height, usually between 3 to 6 inches, which can make a basement with already low ceilings feel a bit more enclosed.
This diagram helps show how the intended purpose of your basement can steer you toward the right ceiling.
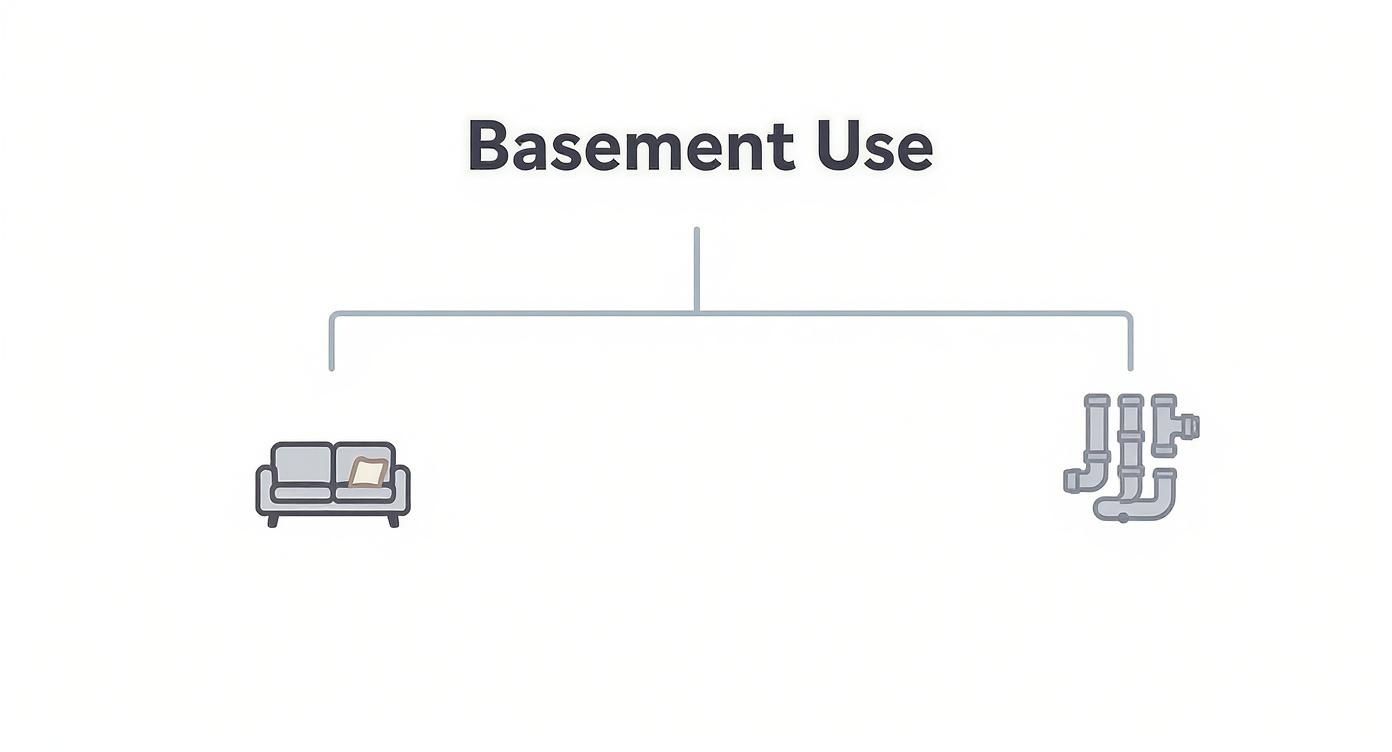
As you can see, spaces meant for everyday living often lean toward a finished look, while areas with critical plumbing or wiring really benefit from having easy access.
The Rustic & Industrial Style: Exposed Ceilings
Looking for something with a bit more personality? You could skip covering the joists altogether. An exposed ceiling involves cleaning up and then painting or staining the existing floor joists, pipes, and ductwork. This is the go-to approach for achieving that industrial loft, modern farmhouse, or rustic barndominium style popular in rural Texas homes.
Painting everything a single, unifying color—usually a matte black or a crisp white—can look surprisingly sharp and sophisticated. It also has a neat trick of making the ceiling feel way higher than it actually is by drawing the eye upward.
The key to a great-looking exposed ceiling is all in the prep work. You can't just slap paint on and call it a day. All the wiring has to be organized and tidy, plumbing needs to be clean, and the joists themselves should be in good shape. It's a look that celebrates the structure of your home, not one that hides it.
While this can be one of the most budget-friendly options material-wise, it can be quite labor-intensive to get it looking just right. Another big consideration is sound—it offers zero soundproofing between floors. That makes it a poor choice for a quiet home office right below a playroom or busy kitchen.
To make things even clearer, here’s a quick breakdown of how these three main options stack up against each other.
Comparing Common Basement Ceiling Finishes
Ceiling Type | Average Cost (per sq ft) | Pros | Cons | Best For |
|---|---|---|---|---|
Drywall | $2 - $4 | Seamless, "upstairs" look; Maximizes ceiling height; Good for soundproofing. | Difficult access to pipes/wiring; Messy installation; Repairs can be complex. | Living rooms, home theaters, guest suites, or any space where a polished look is key. |
Suspended (Drop) | $3 - $6 | Unbeatable access to utilities; Easy to install and repair; Wide variety of styles. | Reduces ceiling height; Can sometimes look less "finished" than drywall. | Basements with lots of plumbing, utility rooms, workshops, and multi-purpose spaces. |
Exposed | $1 - $3 | Creates a high-ceiling feel; Unique industrial/rustic style; Budget-friendly materials. | No soundproofing; Labor-intensive prep; Exposes all pipes and ducts. | Game rooms, bars, workshops, or any area where you want a bold, character-rich design. |
This table should give you a good starting point, but remember that costs and timelines can vary based on the specifics of your basement.
Other Creative Ceiling Finishes
While those are the big three, we're seeing some other creative ideas gain popularity in North Texas custom builds.
Wood Planks: Tongue-and-groove wood like shiplap or beadboard can be installed right onto the joists. It adds incredible warmth and texture, perfect for creating a cozy family room or a rustic den.
Corrugated Metal: For a really bold industrial or modern farmhouse style, corrugated metal panels are an affordable and surprisingly durable option. They work great in a game room or a home gym.
In the end, the best ceiling really comes down to what you value most. Is it the polished look of a formal living space, the practical utility of easy maintenance, or a unique design that makes a statement? Once you answer that, you’ll know which direction to go.
Getting Practical: What Really Matters for North Texas Basements
When you’re finishing a basement ceiling in places like Granbury or Glen Rose, it's about much more than just aesthetics. Our unique North Texas climate throws a few curveballs you need to be ready for. Thinking through these practical factors from the get-go is the difference between a beautiful new space and a future headache.
Let's walk through the four biggest things every homeowner needs on their radar: moisture control, easy access to utilities, soundproofing, and great lighting.
Taming Moisture in Our Humid Climate
It’s no secret that it gets humid here, and all that moisture naturally settles in the lowest part of your home: the basement. Your new ceiling can become a breeding ground for mold and mildew, which is a threat to both your home’s structure and your family’s health. This makes your choice of materials absolutely crucial.
For instance, standard paper-faced drywall acts like a sponge in a damp basement. That’s why we almost always recommend using moisture-resistant or paperless drywall instead. These products are faced with a fiberglass mat that won’t feed mold, giving you a vital first line of defense.
If you're leaning toward a suspended ceiling, be sure to look for tiles specifically rated for high-humidity areas. Many modern mineral fiber and PVC tiles are designed to resist sagging and are inherently mold-resistant—a smart, durable choice for our local climate.
Don't Box Yourself In: Planning for Utility Access
Your basement ceiling is hiding the guts of your home—plumbing, HVAC ductwork, and electrical wires. It’s tempting to just cover it all up for a clean look, but what happens when a pipe springs a leak or you decide you want to install a new light over the new pool table?
Planning for access isn't just a convenience; it's a strategic decision that saves you money and headaches down the road. Tearing out a finished drywall ceiling to fix a minor plumbing issue can turn a simple repair into a multi-day construction project.
This is where a suspended ceiling is the undisputed champion, especially for rural properties in Weatherford or Tolar that have well and septic systems. Need to do an inspection or fix something? Just pop a tile out. It takes seconds.
If your heart is set on a solid drywall ceiling, no problem. We can install discreet access panels near critical spots like water shut-off valves or plumbing cleanouts. It’s a simple solution that maintains the polished look while giving you an emergency entry point right where you need it.
Shhh: Soundproofing for a More Peaceful Home
The basement is often the fun zone—the home theater, the game room, the kids' playroom. But all that fun can get loud, and the noise has a bad habit of traveling right up into the main living areas. Good soundproofing is the key to keeping the peace.
For truly effective sound control, we focus on a few key components:
Acoustic Insulation: Unlike standard insulation, acoustic batts are dense and made from materials like mineral wool designed specifically to absorb sound waves. We pack this between the floor joists.
Resilient Channels: These thin metal strips attach to the joists before the drywall goes up. They create a small air gap that essentially separates the ceiling from the floor above, stopping vibrations in their tracks.
Acoustic Drywall: We typically use thicker 5/8-inch drywall instead of the standard 1/2-inch because its added mass is great at blocking sound. For a dedicated home theater, we might even install a double layer with a special sound-dampening compound like Green Glue sandwiched between them.
Whether you have active kids or are a retiree who just values a quiet home, investing in proper soundproofing is one of the best decisions you can make.
Let There Be Light: Integrating Smart and Effective Lighting
Good lighting is what transforms a dark cellar into a bright, welcoming living space. Your ceiling choice and your lighting plan are completely intertwined, so they need to be designed together.
With a drywall ceiling, recessed can lights are king. They give you clean, even light without dropping down into your headspace. We can lay them out in a grid for perfect general illumination in a home office or cluster them to highlight a specific area, like a wet bar.
Drop ceilings, on the other hand, offer amazing flexibility. You can use standard recessed lights made for suspended grids or install sleek, modern LED panel lights that fit perfectly into the grid. These panels throw off a bright, diffuse light that’s ideal for workshops, home gyms, or laundry rooms. No matter which ceiling you choose, put everything on dimmer switches. You’ll be glad you did—it gives you total control over the mood of the room.
Getting a Handle on Your Basement Ceiling Budget
Every successful remodel starts with a solid, realistic budget. When it comes to finishing your basement ceiling, knowing the real-world costs right from the start helps you make smart choices that you'll be happy with for years to come. Let's dig into what homeowners in places like Weatherford and Aledo can realistically expect, from material costs to labor rates.
The final bill for a basement ceiling in North Texas can swing widely based on the size of your space, the materials you choose, and the complexity of the job. A simple, flat drywall ceiling in a small, rectangular room is going to be far more affordable than a custom job with intricate soffits to hide ductwork or high-end acoustic tiles for a home theater.
Breaking Down the Costs
Across the country, the average price tag to finish an entire basement hovers around $32,000, and the ceiling is a significant slice of that pie. You can see a great overview of how different project elements add up in this helpful guide from Angi.
Here in North Texas, here’s what really drives the cost:
Materials: This is where you have the most control. Standard drywall is your most budget-friendly starting point. A suspended ceiling with basic tiles is a moderate step up, while things like premium acoustic tiles, tongue-and-groove wood planks, or coffered designs will push you toward the higher end.
Labor: The more complicated the job, the more you'll invest in skilled labor. A wide-open room with a simple layout is a straightforward install. But a ceiling with multiple angles, soffits for HVAC runs, or a custom recessed lighting plan takes more time and expertise.
Special Features: This is the fun stuff! Adding soundproofing insulation, sleek recessed lighting, or built-in speakers will add to both material and labor costs. But these are the details that take a basement from just "finished" to truly exceptional.
A great way to keep your budget in check is to be honest about the room's main purpose. If you're building a home theater, go all-in on soundproofing. If it's a workshop, durable materials and fantastic lighting should be your priority, not necessarily a flawless, seamless finish.
A Realistic Project Timeline
Knowing how long things will take helps you plan your life and keeps the disruption to a minimum. While every project has its own quirks, here’s a general roadmap for a professional basement ceiling installation.
Prep Work (1-2 Days): Clearing the area, protecting your floors and walls, and getting any initial electrical or plumbing work roughed in.
Framing and Soffits (1-3 Days): If we need to box in ductwork or create different ceiling heights, this is when the framework goes up. For a suspended ceiling, we'll be installing the grid system during this phase.
Installation (2-4 Days): This is when we're either hanging and taping drywall or setting the tiles into the grid.
Finishing (3-5 Days): With drywall, this is where patience pays off. It involves applying multiple coats of joint compound (or "mud"), sanding between each layer, and letting everything dry completely. You can't rush a smooth finish.
Priming and Painting (1-2 Days): The final touch. Once the surface is perfectly smooth and clean, we'll apply a coat of high-quality primer, followed by two coats of your chosen ceiling paint.
All told, a professional basement ceiling project typically takes anywhere from one to three weeks. The biggest variable is almost always the drywall finishing and all the necessary drying time between coats.
Planning your budget and timeline in tandem is the secret to a smooth project that delivers exactly what you envisioned. For more great tips on getting the best value out of your renovation, check out our guide on maximizing your home remodel return on investment in North Texas.
Deciding Between DIY and a Professional Builder
It's one of the biggest crossroads for any homeowner: should I tackle this myself or call in a pro? When it comes to finishing a basement ceiling here in Granbury or Weatherford, the temptation to go the DIY route is strong. The honest answer is, it depends entirely on your skills and the scope of the job.
For a handy homeowner with the right tools, installing a simple suspended grid ceiling in a basic, rectangular room is definitely achievable. It takes a lot of careful measuring, leveling, and cutting, but with enough patience, it's a manageable project. But for most people, that's where the DIY-friendly part ends.

When to Call in the Pros
There are some very clear signals that it’s time to put down the tools and pick up the phone. These aren't just about making life easier; they're about safety, the final quality of the work, and staying on the right side of local building codes.
If your project involves any of the following, it’s best left to a licensed professional:
Electrical Work: Moving light fixtures, adding recessed cans, or wiring new switches isn’t just a simple task. Faulty wiring is a major fire risk, plain and simple.
HVAC Modifications: Need to reroute ductwork to get more headroom or box it in with soffits? A pro will know how to do it without messing up your home's heating and cooling balance.
Plumbing Adjustments: Shifting water supply lines or drain pipes is a job for an expert. One bad connection can lead to slow leaks and major water damage down the road.
Achieving a Flawless Drywall Finish: Getting that perfectly smooth, seamless drywall ceiling (what the pros call a Level 5 finish) is truly an art. It takes years of experience to get it right, and a botched mudding and taping job is impossible to hide.
The real value a professional brings isn't just the labor—it's the foresight. A good builder sees the whole picture, from the joists to the final coat of paint, and knows how every single decision affects the next step. They aren't just putting up a ceiling; they're making sure the entire system works together perfectly.
The Value of a Professional Builder
When you hire a team like Gemini Homes, you're not just paying for skilled hands. You're investing in experience and genuine peace of mind. A professional builder takes the entire project off your plate, handling everything from pulling the right permits in Glen Rose to scheduling the electricians, plumbers, and drywall crews. We know the ins and outs of North Texas homes and build things to last.
To get a better idea of what a professionally managed project involves, take a look at our homeowner's guide to the timeline of construction.
Plus, a professional carries the right insurance. That protects you from any liability if an accident were to happen on your property. For families with kids running around or retirees who just want a stress-free renovation, that peace of mind is worth its weight in gold.
Achieving a Perfect Finish with Gemini Homes
Picking the right ceiling is a great start, but making sure it’s installed perfectly is what truly makes a basement feel finished. After all, a professional installation is what brings the whole vision together.
Here at Gemini Homes, we've spent years turning basements across Granbury, Weatherford, and the North Texas area into spaces families actually want to use. We know the unique quirks of building in this region, from tackling our notorious humidity to ensuring everything is built to last. It's one thing to have a plan; it's another to execute it flawlessly.
Our team takes care of all the details that make a difference. We’ll make sure your recessed lighting is integrated beautifully, your soundproofing is effective, and you still have easy access to your plumbing and electrical when you need it. We’ve always believed that great work is about more than just construction—it’s about communication and trust. That’s why customer service in the construction industry truly matters to us. It’s how we deliver a final result you’ll love for years.
Common Questions About Finishing Basement Ceilings
When you're getting ready to tackle your basement ceiling, a lot of questions pop up. Here are straightforward answers to the questions we hear most often from homeowners in Granbury, Weatherford, and all over North Texas.
What Is the Best Ceiling Option for a Low Basement?
Every inch matters in a basement, especially when you're not working with a lot of height to begin with. For basements with limited headroom, drywall is often the best choice. It installs snugly against the floor joists, taking up the least amount of vertical space possible.
Painting that new drywall a bright, light color—like a crisp white or a soft off-white—can also work wonders. It reflects light, creating an illusion of height and making the whole space feel more open. Another great route to go is an exposed ceiling. By painting the joists and everything between them a single, uniform color, you draw the eye upward and can make the room feel surprisingly taller.
How Can I Soundproof My Basement Ceiling?
This is a big one. Soundproofing is essential if you're planning a quiet home office or need to contain the noise from a home theater or the kids' playroom. Real, effective sound control is a layered process. Here’s how we approach it:
Acoustic Insulation: First, we fill the cavities between the floor joists with dense, sound-absorbing mineral wool insulation. This is your first line of defense.
Resilient Channels: Next, we attach thin metal strips, called resilient channels, to the joists before the drywall goes up. They create a small air gap that essentially decouples the ceiling from the floor above. This step is a game-changer for stopping vibrations, like footsteps.
Mass and Dampening: Finally, we install a double layer of thick, 5/8-inch drywall. For the best results, we can add a layer of special sound-dampening compound between the two sheets. If you're going with a drop ceiling, using high-quality acoustic mineral fiber tiles is a great alternative that does a fantastic job of absorbing sound within the room itself.
Do I Need a Permit to Finish My Basement Ceiling in North Texas?
That's a smart question to ask, and the answer really depends on what your project involves and where you live, whether that's Parker County or Hood County. Generally, if you're only putting up a finished surface like drywall or ceiling tiles, you probably won't need a permit.
However, the moment your project involves any new electrical wiring or changes to your HVAC system, a permit is almost always required. This includes things like adding recessed lights, moving a fixture, or rerouting ductwork.
The safest and smartest move is to always check with your local city or county building office in Granbury, Aledo, or wherever you are before starting any work. This keeps your project safe, ensures it’s up to code, and prevents headaches down the road. It’s clear people are investing in these upgrades; the global market for ceiling tiles is expected to hit USD 26.5 billion by 2035, which just shows how popular they've become in home renovations. You can dig into more of these market trends over at Fact.MR.
At Gemini Homes, we help North Texas homeowners figure out these details every single day. If you’re ready for a basement that adds real value and function to your home, we'd love to talk about your project. Explore your options with us today.
Comments